I love squash. All kinds of squash. They’re kind of amazing vegetables due to the fact that they adapt very well to both savory and sweet dishes. They’re so versatile and so delicious – everyone should eat more squash!
Butternut squash is probably one of the most popular types of squash out there these days. However, it’s a tough bugger to cut. I love butternut squash but I absolutely hate peeling and slicing it so I admit that I don’t eat as much of it as I probably could.
But this weekend I got brave. I went out and bought a fresh squash, rolled up my sleeves, and went to town on it with the biggest and sharpest knife I had. It still took awhile, but I destroyed that squash in the end. Then I cooked it up with some other veggies, threw them all in my food processor and turned it all into delicious soup.
And it was good…
Curried Butternut Squash Soup
(Adapted from Martha Stewart’s Puréed Butternut Squash Soup)
Ingredients:
2 tablespoons butter
1/2 an onion, chopped
2 tablespoons fresh ginger, chopped
3 garlic cloves, chopped
2 stalks celery, chopped
2¾ pounds small butternut squash, prepared and cut into 3/4-inch cubes
2 cups vegetable stock
2 cups water
1/2 cup peanut butter
Curry powder
Coarse salt and ground pepper
Directions:
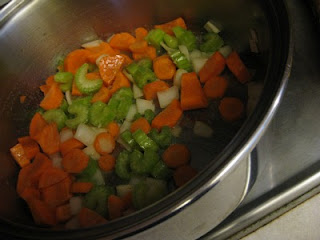
Melt butter in a large saucepan over medium heat. Cook onion, ginger, garlic and celery until fragrant (about 2 minutes). Add squash and cook, stirring occasionally, until fragrant (about 6 to 8 minutes). Stir in water and stock. Bring to a boil; reduce heat. Simmer until squash is tender (20 minutes).
Purée your soup in two batches. (*Note: When blending hot foods, allow the heat to escape to prevent splattering. Remove the cap from the hole of the blender’s lid, and cover with a dish towel.)
When soup is blended, pour back into pot and stir in peanut butter, and enough curry powder and salt and pepper to suit your tastes. Serve hot.
Monday, January 31, 2011
Sunday, January 30, 2011
Rye Bread
I apologize for the severe lack of baking last week. I was working 2 jobs and therefore, was only home to sleep and had very little time or energy to bake…I actually had zero baking in my house. That never happens.
So this weekend I baked like a madwoman! Today, I made more bread…as I’m embracing my newfound ability to correctly engineer yeast. I’m kind of in love with yeast now – it’s amazing stuff! I can’t believe I used to hate it so much. It’s like a guy I grew up with whom I couldn’t stand and used to drive me crazy...who suddenly got super hot, amazing and successful after high school. That is what yeast is in my life right now.
My life is kind of pathetic.
Anyways, today I made rye bread. I love rye bread. It’s without question my number one choice for sandwiches. And I will definitely be making a lot of those now.
Rye Bread
(Adapted from the back of my Rogers Dark Rye Flour bag)
Ingredients:
1/2 cup warm water
1 tsp honey
1 tbsp yeast
2 tbsp honey
1/4 cup vegetable oil
1 tbsp sea salt
1¾ cups warm water
3 cups dark rye flour
2-3 cups all-purpose flour
Directions:
First, dissolve your yeast and 1 tsp of honey in 1/2 cup of warm water. Let it stand for about 10 minutes.
In a large bowl, mix together the 2 tbsp honey, vegetable oil, salt and 1¾ cups warm water. Add the yeast mixture and mix well.
Add the rye flour and beat vigorously for 2 minutes. Stir in a sufficient amount of all-purpose flour to make a soft and workable dough. Knead for 5 minutes until dough is smooth and elastic.
Form the dough into a ball and place in a greased bowl, turning it over once so that the top is greased. Cover and let rise for about 1-1½ hours, until doubled in bulk.
After the first rise, punch down dough and form it into 2 smooth balls. Cover and let rest for about 20 minutes, then roll each ball into a long, rounded loaf. Place on a greased baking sheet. Using a sharp knife, make 3 or 4 shallow diagonal slashes across the top of each loaf. Let rise an additional 1/2 hour.
Bake at 375 degrees F for 40-50 minutes. When done, remove from baking sheet and cool on a wire rack.
(*Note: My oven is old and testy, so I turned it down to 350 for the last 15 minutes to avoid burning. Just keep an eye on the bread to be safe.)
Monday, January 24, 2011
Basic French Toast
French toast. I don’t crave it very often – I’m more of a pancake kind of girl – but when I do get a hankering for that sweet, eggy bread…I usually have to satisfy it right away.
This weekend, I had it twice. I went for brunch at one of my favorite restaurants, Padmanadi, and had the most delicious coconut banana French toast. It inspired me to start making variations on French toast more often, as it’s like a pancake in the sense that it takes well to experimentation.
Today however, I’m just gonna share my basic French toast recipe. It’s kind of a no-fail, guaranteed delicious kind of thing. It’s also a great way to use up stale bread. I used some leftover whole wheat bread I made last week, but French bread is also really great and one of my favorite breads to use is actually rye bread.
P.S. Cinnamon raisin is pretty awesome too… in a heavenly I-can’t-believe-this-even-exists kind of way.
French Toast
Ingredients:
4-6 slices of bread
2 eggs
1 cup milk - vanilla soy milk is really nice too
1/2 tsp vanilla
pinch cinnamon (optional)
butter (for the pan)
Directions:
Beat the eggs in a shallow bowl and slowly mix in the milk and vanilla (and cinnamon, if you’re using it).
Over medium heat, heat a frying pan coated with a thin layer of butter.
While the frying pan is heating up, place the bread slices into the bowl one at a time, letting them soak up the egg mixture for a few seconds, then carefully turn them to coat the other side. Only soak as many slices as you will be cooking, as they can get too soggy otherwise.
Transfer the bread slices to your frying pan, heating slowly until the bottoms are golden brown. Turn and brown the other sides as well.
Serve hot with butter, syrup, icing sugar, whipped cream, fresh fruit and anything else your little heart desires!
Wednesday, January 19, 2011
Banana Chocolate Chip Muffins
And so my banana recycling continues…I'm slowly but surely making my way through a freezer of over-ripe bananas. Thankfully, bananas are very versatile when it comes to baking and can add moisture and flavour to just about anything.
So I made banana muffins the other night. There isn’t really much else to say about it except that they were scrumptious. Mainly because I also added chocolate chips.
Bananas and chocolate were meant to be. Don’t fight it.
Banana Chocolate Chip Muffins
(Adapted from Cat Can Cook’s Awesome Banana Muffin recipe)
Ingredients:
3-4 large bananas, mashed
1/2 cup brown sugar
1 egg, slightly beaten
1/3 cup butter, melted
1 teaspoon baking soda
1 teaspoon baking powder
1/2 teaspoon salt
1½ cups flour
1 cup (or so…) chocolate chips
Directions:
Preheat oven to 350 degrees F.
Mix the mashed banana, sugar, egg and butter together and set aside. In a separate bowl, mix together baking soda, baking powder, salt and flour. Add the wet ingredients to the dry ingredients and mix just until moistened (don’t overmix!). Fold in chocolate chips.
Pour into paper-lined muffin tins and bake for approximately 20 minutes.
Enjoy!!
Monday, January 17, 2011
Cheddar Parmesan Buttermilk Biscuits
I have always had a deep love for biscuits. I remember when I was little, I used to ask to go to Red Lobster every year for my birthday solely so that I could eat dozens of those garlic cheese biscuits they have there. I also remember biscuits being one of the first things I EVER baked, back in a baking class I took when I was in elementary school. I’ve been making, eating and loving them for years.
My sister hosted our weekly Sunday family dinner last night, and usually I get conned into making dessert (which I never object to) but when I phoned her yesterday afternoon, she asked for biscuits (as we were having soup for dinner) – preferably with cheddar in them. So I played around with one of my favorite biscuit recipes, grated up some cheddar and parmesan cheese I had in my fridge, and created some friggen amazing biscuits. I actually had to stop my boyfriend from eating them, as I almost didn’t even have any left to bring to dinner.
Cheddar Parmesan Buttermilk Biscuits
(Adapted from the Prepared Pantry’s Easy Buttermilk Biscuits)
Ingredients:
2 cups all-purpose flour
2 teaspoons baking powder
1/2 teaspoon baking soda
1/2 teaspoons salt
1/2 tablespoon sugar
1/2 cup cold butter
1 cup plus one tablespoon buttermilk
1 heaping cup grated sharp cheddar cheese
1/2 cup grated parmesan cheese
Directions:
Preheat the oven to 425 degrees. Oil a baking sheet. (This is important, as these suckers like to stick.)
Mix together the flour, baking powder, baking soda, salt and sugar. Slice the cold butter into the flour mixture. Use a pastry blender (or two kitchen knives) to cut the butter into the flour mixture until you have a coarse, grainy mixture.
Stir in grated cheese. Make a well in the middle of the dry mixture and pour the buttermilk into it. Stir just until moistened. The dough should be of a consistency like drop cookie dough or just a bit stiffer. If it is not moist enough, add another tablespoon of buttermilk.
Spoon the dough into rounded mounds on the baking sheet, leaving room for expansion.
Bake for 12 to 14 minutes or until the biscuits just begin to brown. I actually ended up turning my oven down to in between 400 and 425 as my first batch nearly burned at 425, so watch them carefully. Remove the biscuits from the baking sheet and place them on a wire rack to cool.
Sunday, January 16, 2011
Chocolate Cupcakes with Mocha Buttercream
I used to hate chocolate cupcakes. Scratch that – I used to hate making chocolate cupcakes. I had mastered a pretty amazing vanilla cupcake, but I struggled to find a good chocolate cupcake recipe. They would always come out dry or not chocolatey enough and needless to say, I always ended up frustrated.
Then I found Martha. She has this “One Bowl Chocolate Cupcake” recipe and it’s pretty much perfect. It’s so simple, as you really only use one bowl, and the cupcakes turn out moist and just chocolatey enough. They aren’t too dense and fudgy so they take well to a heavy chocolate or peanut butter icing.
A good friend of my brother and I, a lovely girl named Kayla (who also has her own blog here), had a birthday this weekend. Unfortunately, since she lives in an apartment, she couldn’t have a big party so we volunteered our house to have the party for her. Naturally, I made cupcakes. She told me she wanted chocolate and since I knew she was also a big fan of coffee, I topped them with a mocha buttercream.
Unfortunately, the reviews were mixed, as about half the people at the party didn’t like coffee (crazy people...). But I still think these are amazing. They’re not too sweet so it’s a nice change.
One-Bowl Chocolate Cupcakes
(Taken from my Martha Stewart Cupcakes book)
Ingredients:
3/4 cup unsweetened cocoa powder
1½ cups flour
1½ cups sugar
1½ teaspoons baking soda
3/4 teaspoon baking powder
3/4 teaspoon salt
2 large eggs
3/4 cup warm water
3/4 cup buttermilk
3 tablespoons vegetable oil
1 teaspoon pure vanilla extract
Directions:
Preheat oven to 350 degrees. Line standard muffin tins with paper liners; set aside.
Sift together cocoa powder, flour, sugar, baking soda, baking powder, and salt into a large bowl. Add eggs (I actually cheat and lightly beat these first in a separate bowl), warm water, buttermilk, oil, and vanilla, and mix until smooth (about 3 minutes). Scrape down the sides and bottom of bowl to assure batter is well mixed.
Divide batter evenly among muffin cups, filling each about 2/3 full. Bake until tops spring back when touched, about 20 minutes, rotating pan once if needed. Transfer to a wire rack; let cool completely.
Mocha Buttercream
Ingredients:
1/2 cup butter, softened
2 ounces unsweetened chocolate, melted
3 tsp instant espresso
3 tsp hot water
icing sugar
cocoa powder
Directions:
Unfortunately, I suck at using recipes for icing…I kind of just make it up as I go. But basically, first mix your hot water with espresso powder. Then, beat the butter, melted chocolate and espresso mixture together. Now you can add as much icing sugar as you need and beat it in until the buttercream is at the consistency you want. I also added a little bit of cocoa powder to give it some more chocolate flavor.
Thursday, January 13, 2011
Bread Take 2 - Whole Wheat
I took my bread making to the next level this week…I figured that if I could master a simple yeasted white bread, I should do something to try and make it slightly healthier.
So, I researched some other bread recipes, added some whole wheat flour and bran into the mix (because fiber is good for you!) and the bread turned out delicious. I used it for sandwiches all week and it’s amazing just the difference in flavor compared to most store-bought breads. It’s got a mild sweetness to it from the brown sugar that’s just lovely. It also makes a mean toast.
I may never buy bread from the supermarket again…
Whole Wheat Bread
Ingredients:
4 tbsp butter
1 cup milk
1½ tsp yeast
1 tsp salt
3 tbsp brown sugar
3 cups flour (I used half whole wheat, half white)
1/2 cup wheat bran
Directions:
Melt the butter and the milk together in the microwave. While you do this, mix your yeast with a little bit of warm water to activate it. Let it sit for about 5 minutes.
After the butter is melted and your milk/butter mixture is lukewarm, mix it with the yeast in a large bowl. Add in the salt and sugar and mix well. Add the flour and bran last and stir until all the ingredients come together into a sticky ball.
Knead for about 5-7 minutes – dough should be elastic and moist. Place in a greased bowl and cover with the tea towel. Allow dough to rise for about an hour, or until doubled in size.
When dough has risen, punch down and knead out air bubbles. Form the dough into a loaf, place in a greased loaf pan and allow to rise, covered, for another 30 minutes.
Bake for 45 minutes at 350 degrees F. Allow to cool completely before slicing.
Saturday, January 8, 2011
Chicken Pot Pie for a snowy day
The snowpocalypse hit today. We got 30 cm last night (and even more today…) and I was awakened at 7 AM to a knock on my door as my brother was stuck in our alley and needed help. I spent the first hour of my morning pushing and shoveling. Consequently, I decided to hibernate for the remainder of the day.
So I made chicken pot pie. On days like today, you shouldn’t have to do anything besides curl up in your favorite sweats and watch movies and eat chicken pot pie. However, if you happen to get laundry done and your Christmas decorations taken down, so much the better!
Chicken Pot Pie
This recipe is more like a casserole with a top crust as Matt isn’t a fan of savory pies (being the pie-lover he is, I don’t understand this in the least) so I had to trick him into thinking it was a casserole. You can still make this pie with a bottom crust as well though.
Ingredients:
1/4 cup unsalted butter
3 carrots, sliced
2 stalks celery, sliced
1/2 an onion, chopped
2 garlic cloves, minced
1/2 tsp dried thyme
1/2 cup flour
3 cups chicken broth
1/4 cup whipping cream
2 bay leaves
3 cooked chicken breasts, cut into 1-inch pieces
1 cup frozen peas
2 tbsp minced fresh parsley
pastry for a single crust pie
salt & pepper
Directions:
Preheat the oven to 425 degrees F.
Melt the butter in a large pot over medium heat. Add the carrots, celery, onion and about a 1/4 tsp salt, and cook until softened (about 6-7 minutes).
Stir in the garlic and thyme and cook until fragrant. Stir in the flour, then slowly stir in the broth, cream and bay leaves. Simmer until the mixture is thickened (about 10 minutes).
After the mixture has thickened, discard the bay leaves and stir in the chicken, peas and parsley. You can add any additional salt & pepper to taste here as well.
Pour the mixture into a 9x13 inch baking dish. Roll out pie dough, drape it over the dish and trim. Bake at 425 F until the top is golden brown and bubbly (about 20-25 minutes). Let cool for about 5-10 minutes before serving.
P.S. My good foodie friend Lindz also has a yummy chicken pot pie recipe here. Check it out!
Friday, January 7, 2011
Bread & Butter
Today, something magical happened.
I made bread.
Real, yeasted, soft, delicious bread. Not gummy on the insides, not burnt on the outsides…just, amazing. Today, I broke my curse. Today, I became a woman.
Now, I know that all sounds very dramatic (though, let’s be honest - I’m a pretty dramatic person) however it makes me feel so good that I have FINALLY accomplished this. I guess I just had to take the time to commit to it. To follow a recipe…and find success.
Oh, and I also made butter…
BUTTER.
From. Scratch.
I was, once again, pretty amazed with myself. I may have laughed maniacally for about 10 minutes...I may have also made up songs about how awesome I am...my brother may have stood in the corner of the kitchen and wondered if he was adopted while all of this was happening...
But now, if you’ll excuse me, I have half a loaf of bread left to eat.
Success Bread
I took this recipe from here, but I halved it as I only had one packet of yeast left and I also didn’t want to waste a bunch of flour if it ended up being a fail…thankfully, it was amazing and I’ll be definitely using this recipe again and making 2 loaves next time so that I can give one away! Or...freeze it. Or...eat it.
Ingredients:
1/2 cup milk
1 tbsp butter
3/4 cup warm water
1 package active dry yeast
1 tbsp sugar
1/2 tbsp salt
3 cups of unbleached bread flour
Directions:
Heat the milk and butter in a small saucepan over medium heat (I used the microwave and it worked just as well). Remove from heat when the butter is melted. Set aside to cool.
Pour 1/4 cup of the warm water into a small bowl. Slowly pour yeast into bowl while stirring. The constant stirring while adding the yeast will prevent the dry yeast from clumping. Set the bowl of yeast water aside for about 5 minutes.
In a large bowl, mix the sugar, salt and remaining 1/2 cup of warm water. Add the milk and butter mixture and mix. Pour the yeast water into the large bowl (It is important that the batter is warm, not boiling hot. Hot liquid, such as the milk you heated up, will kill the dry yeast and prevent the bread from rising).
Begin mixing in the flour, one cup at a time. By the 3rd cup of flour, the dough will begin to get stiff and it will be difficult to mix it with a spoon. Turn dough out onto a floured board and begin to knead the dough. Continue adding more flour and kneading the flour into the dough until the dough is smooth, not sticky.
Grease a large bowl with butter. Put the bread dough into the bowl and then turn the dough over so that the top of the dough is buttered. Cover the bowl with a kitchen towel and let the dough rise at room temperature until double in size or about 1 hour.
Punch down dough. Turn it out onto a floured board and knead out all the bubbles for about 5 minutes. Divide the dough in half and form each half into a loaf by rolling the dough into a rectangle. Roll the dough up like a jellyroll. Pinch seam closed. Pinch and tuck edges under the loaf.
Set loaf in a buttered loaf pan, cover with kitchen towel, and allow to rise until double in size (about half an hour).
Preheat oven to 375 degrees F. Bake bread for about 45 minutes or until golden brown. Remove bread from oven and turn out loaves onto a rack or a clean kitchen towel. Allow to cool before cutting.
Butter
I knew that homemade butter wasn’t impossible. In fact, one time when I was whipping cream, I wasn’t really paying attention and my sister jokingly asked if I was trying to make butter. I researched this and discovered that it’s true - if you whip cream for a very long time, it turns into butter. And I decided that because I had a fresh loaf of homemade bread and half a carton of whipping cream in my fridge, I might as well give it a try!
First, you need whipping cream. I had about a cup of it.
Second, you need a stand mixer. I’m still saving for one so I used a hand mixer.
Pour the whipping cream into a pretty big bowl. Mix on high for about 10 minutes.
After 10 minutes of mixing, the pale yellow butter should separate from the butter milk (this is when the maniacal laughing began). You might need a towel at this point as it gets a little splattery if your bowl is too small.
Once it’s mostly separated, scoop it out with a slotted spoon and put in a bowl. You can add salt at this point too, if you want salted butter.
ENJOY! And praise yourself for being a domestic goddess...I did.
I made bread.
Real, yeasted, soft, delicious bread. Not gummy on the insides, not burnt on the outsides…just, amazing. Today, I broke my curse. Today, I became a woman.
Now, I know that all sounds very dramatic (though, let’s be honest - I’m a pretty dramatic person) however it makes me feel so good that I have FINALLY accomplished this. I guess I just had to take the time to commit to it. To follow a recipe…and find success.
Oh, and I also made butter…
BUTTER.
From. Scratch.
I was, once again, pretty amazed with myself. I may have laughed maniacally for about 10 minutes...I may have also made up songs about how awesome I am...my brother may have stood in the corner of the kitchen and wondered if he was adopted while all of this was happening...
But now, if you’ll excuse me, I have half a loaf of bread left to eat.
Success Bread
I took this recipe from here, but I halved it as I only had one packet of yeast left and I also didn’t want to waste a bunch of flour if it ended up being a fail…thankfully, it was amazing and I’ll be definitely using this recipe again and making 2 loaves next time so that I can give one away! Or...freeze it. Or...eat it.
Ingredients:
1/2 cup milk
1 tbsp butter
3/4 cup warm water
1 package active dry yeast
1 tbsp sugar
1/2 tbsp salt
3 cups of unbleached bread flour
Directions:
Heat the milk and butter in a small saucepan over medium heat (I used the microwave and it worked just as well). Remove from heat when the butter is melted. Set aside to cool.
Pour 1/4 cup of the warm water into a small bowl. Slowly pour yeast into bowl while stirring. The constant stirring while adding the yeast will prevent the dry yeast from clumping. Set the bowl of yeast water aside for about 5 minutes.
In a large bowl, mix the sugar, salt and remaining 1/2 cup of warm water. Add the milk and butter mixture and mix. Pour the yeast water into the large bowl (It is important that the batter is warm, not boiling hot. Hot liquid, such as the milk you heated up, will kill the dry yeast and prevent the bread from rising).
Begin mixing in the flour, one cup at a time. By the 3rd cup of flour, the dough will begin to get stiff and it will be difficult to mix it with a spoon. Turn dough out onto a floured board and begin to knead the dough. Continue adding more flour and kneading the flour into the dough until the dough is smooth, not sticky.
Grease a large bowl with butter. Put the bread dough into the bowl and then turn the dough over so that the top of the dough is buttered. Cover the bowl with a kitchen towel and let the dough rise at room temperature until double in size or about 1 hour.
Punch down dough. Turn it out onto a floured board and knead out all the bubbles for about 5 minutes. Divide the dough in half and form each half into a loaf by rolling the dough into a rectangle. Roll the dough up like a jellyroll. Pinch seam closed. Pinch and tuck edges under the loaf.
Set loaf in a buttered loaf pan, cover with kitchen towel, and allow to rise until double in size (about half an hour).
Preheat oven to 375 degrees F. Bake bread for about 45 minutes or until golden brown. Remove bread from oven and turn out loaves onto a rack or a clean kitchen towel. Allow to cool before cutting.
Butter
I knew that homemade butter wasn’t impossible. In fact, one time when I was whipping cream, I wasn’t really paying attention and my sister jokingly asked if I was trying to make butter. I researched this and discovered that it’s true - if you whip cream for a very long time, it turns into butter. And I decided that because I had a fresh loaf of homemade bread and half a carton of whipping cream in my fridge, I might as well give it a try!
First, you need whipping cream. I had about a cup of it.
Second, you need a stand mixer. I’m still saving for one so I used a hand mixer.
Pour the whipping cream into a pretty big bowl. Mix on high for about 10 minutes.
After 10 minutes of mixing, the pale yellow butter should separate from the butter milk (this is when the maniacal laughing began). You might need a towel at this point as it gets a little splattery if your bowl is too small.
Once it’s mostly separated, scoop it out with a slotted spoon and put in a bowl. You can add salt at this point too, if you want salted butter.
ENJOY! And praise yourself for being a domestic goddess...I did.
Wednesday, January 5, 2011
Casseroles instead of cookies
Have you ever seen that Campbell’s commercial where the mother is making dinner and the kids each ask if she’s making their favorite dish, however instead of just saying the name of the dish, they spell out the website url to where the recipe is on cookingwithcampbells.ca? Yeah…I’ve seen it a lot. And I kept thinking that the cheesy broccoli thing that the mom did end up making looked amazing and I had to see what it was.
Now, I’m going to admit that normally I’m a bit of a food snob. I’m not a fan of all those Kraft and Campbell’s recipes as they make you use all their brand-name products and most of them have like, salad dressing in them…it’s weird. But this recipe’s only brand-name ingredient was Campbell’s cream of broccoli soup. So I went out and bought some.
(on a side note, you could probably use no name cream of broccoli soup too…or even cream of mushroom…or chicken…I don’t think it would make a huge difference.)
Anyways, besides the fact that I’ve never opened a can of cream of broccoli soup before in my life and was consequently put off a little when I did (it looks and smells kind of gross..), the whole dish turned out pretty darn good. So good, in fact, that Matt and I ate the whole thing…and it would’ve probably made really good leftovers, but we now have none. Oh well. It was tasty while it lasted.
And I will never doubt cream of broccoli soup again.
Creamy Chicken & Broccoli Casserole
(Adapted from Campbell’s Easy Chicken and Broccoli Divan)
Ingredients:
3 cups broccoli florets, steamed
2 cooked chicken breasts, cut into small chunks
1 can cream of broccoli soup
1/3 cup milk
1/2 cup shredded cheese (I used old cheddar)
2 tbsp dry bread crumbs
1 tsp butter, melted
Directions:
First, cook your chicken breasts (I seasoned and broiled mine). While they’re cooking, steam your broccoli. When chicken is cooked, cut into cubes.
Mix milk with soup in a measuring cup or small bowl. Arrange broccoli and chicken in a baking dish (1.5 qt).
Pour the soup and milk mixture over broccoli and chicken. Sprinkle with cheese. Top with mixture of bread crumbs and butter.
Bake at 425°F until heated through (25-30 minutes).
I promise I'll get back to some dessert recipes soon enough, I just need a little break...and somehow get the rest of my Christmas baking out of my house.
Monday, January 3, 2011
Happy New Year - Have some crepes!
First and foremost, Happy New Year!! I wanted to start with something like, “It’s been a great year of baking…” but seeing as I started this blog only 2 months ago, that doesn’t really make sense…at least for you (my hundreds and thousands of loyal readers). However, I did make a list of New Year Blog Resolutions that I plan on accomplishing in 2011 so that by this time next year, I’ll have lots to reflect on.
They are as follows:
1. Do more restaurant reviews! (As I have yet to do one…)
2. Do more theatre reviews! (As I have yet to do one…)
3. Bake more cupcakes! (As I have to make them for a wedding in September.)
4. Share more healthy recipes! (As the last thing a lot of people want to see right now is more sugar and butter.)
5. Use my slow cooker lots! (Self-explanatory?)
6. Make perfect homemade bread! (I will break my curse…)
7. Learn how to make french macarons! (This may be my biggest challenge of all)
Clearly, all of those needed exclamation points.
I also have a recipe for you today! Last night, I wanted crepes…more specifically, I wanted crepes filled with sautéed apples but my apples were a bit of a fail so I filled the crepes with Nutella instead.
On a side note – I love Nutella. I’m actually planning on doing an entry completely devoted to it. You should be excited…well, at least I am.
Crepes
I always use Leslie Sarna’s recipe for dessert crepes, as I just find it to be the best. Buttery with just enough sweetness, and perfect every time.
Ingredients:
1 cup flour, sifted
2 eggs
1/2 cup milk
1/2 cup water
1/4 tsp salt
1 tsp vanilla
2 tbsp butter, melted
Directions:
In a medium mixing bowl, whisk together all the ingredients but the flour. When mixed, add the sifted flour while continuing to whisk.
Heat a large frying pan on medium heat and spray with cooking spray. Pour about 1/8 to 1/4 cup of batter into the pan. Tilt the pan with a circular motion so that the batter coats the surface evenly.
Cook about 2 minutes on each side or until light golden. Serve hot.
Mmm…
Subscribe to:
Posts (Atom)