Sunday, February 27, 2011

Bittersweet Brownies

Why, hello blog…it’s been awhile.

I’m sorry for the major hiatus these past couple weeks. I’ve been so busy with work and rehearsals and then Matt’s parents were in town and so everything I’ve made has been stuff I’ve made before…as I try not to experiment with new recipes when I’m cooking for house guests, haha.

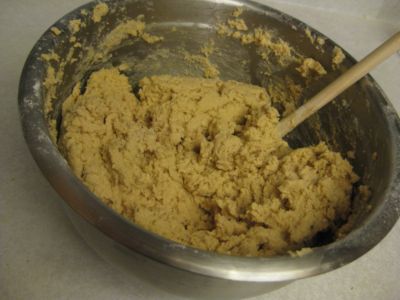
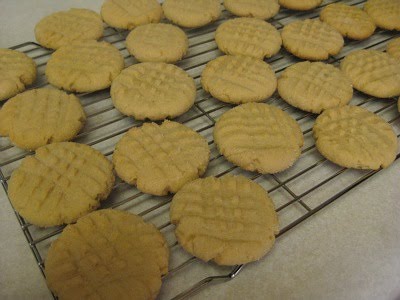
But today I did some baking, as the remains of the carrot cake, apple pie and peanut butter cookies I made had finally disappeared.

It’s been a bit of a rough weekend, so I wanted something comforting.

Brownies are comforting. So I made some.

I used the recipe from my Pure Dessert cookbook by Alice Medrich. I picked it up on sale from Homesense about a month ago for like, $5 and I have to say…it may have been the best $5 I’ve ever spent. It’s a great book and even though I really try not to buy any more dessert cookbooks, I knew I needed to have this one.

Bittersweet Brownies
(Adapted from Alice Medrich’s recipe for New Bittersweet Brownies)
The secret to these brownies is whipping the eggs with the salt, as it gives them a texture between very moist cake and rich chocolate mousse.

Ingredients:

8 ounces unsweetened chocolate, cut into several pieces
6 tablespoons unsalted butter
3 large eggs
¼ teaspoon salt
1 teaspoon pure vanilla extract
1 cup sugar
1/3 cup plus 1 tablespoon all-purpose flour

Directions:

Position a rack in the lower third of the over and preheat the oven to 350°F. Line the bottom and sides of a square baking pan with foil.

Place the chocolate and butter in a heatproof bowl and set in a wide skillet of almost-simmering water. Stir frequently until the mixture is melted and smooth and quite warm. Remove from the pan and set aside.


In a medium bowl, beat the eggs, salt, vanilla and sugar with a hand-held mixer on high speed until the eggs are thick and light colored, about 2 minutes.

Whisk the warm chocolate into the thick egg mixture. Fold in the flour.


Scrape the batter into the pan and spread evenly. Bake until a toothpick inserted in the center comes out clean, about 25 to 30 minutes.

Cool the pan on a rack. When cool, invert the brownies on a rack and peel off the foil.


Turn right side up on a cutting board and cut into sixteen 2-inch squares.

Wednesday, February 16, 2011

Soft & Sweet Peanut Buttery Goodness

We have a bit of a peanut butter epidemic in our house. For some reason, we just keep buying jars of it well before we’re out and consequently, they’ve been seriously piling up…which is surprising considering how much peanut butter I consume.

So, I decided to put our overstock of peanut butter to good use and make peanut butter cookies! It was also my reward for surviving a ridiculously long and stressful day…

Just so you know – these cookies are DEADLY. I ate about 8 right out of the oven…then, I had the dangerous idea to spread Nutella on one…then I decided to make a Nutella sandwich, with the cookies as the “bread”.

Please don’t try this at home if you value your figure.

Peanut Butter Cookies
(Adapted from Joy the Baker’s Peanut Butter Chocolate Chip Cookies)
I omitted the chocolate chips from this recipe simply because I didn’t have any…however, they would still be amazing in these cookies. The cookies themselves are softer than normal peanut butter cookies with just the right balance of sweetness and peanutty taste. They are a nice change from the chunky, hard, super peanut buttery cookies we’re used to.

Ingredients:

2½ cups all-purpose flour
1 teaspoon baking soda
1/2 teaspoon baking powder
1/4 teaspoon salt
1 cup unsalted butter, at room temperature
1 cup peanut butter- crunchy or smooth, but not natural
1 cup light brown sugar (packed)
3/4 cup sugar
2 large eggs

1/2 cup additional granulated sugar (for rolling cookies)

Directions:

Preheat oven to 350 degrees F . Line two baking sheets with parchment paper (or aluminum foil).

Whisk together the flour, baking soda, baking powder and salt.

Working with a stand mixer (or hand mixer) in a large bowl, beat the butter on medium speed for a minute or two, until smooth and creamy. Add the peanut butter and beat for another minute. Add the sugars and beat for 3 minutes more. Add the eggs one at a time, beating for 1 minute after each addition. Scrape down the sides and bottom of the bowl and, on low speed, add the dry ingredients, mixing only until they just disappear. You’ll have a soft, pliable dough.


Pour the 1/2 cup of sugar into a small bowl. Working with a level tablespoonful of dough for each cookie, roll the dough between your palms into balls and drop the balls, a couple at a time, into the sugar. Roll the balls around in the sugar to coat them, then place on the baking sheet, leaving 2 inches between them. Dip the tines of the fork in the sugar and press the tines against each ball first in one direction and then in a perpendicular direction- you should have a flattened rough of dough with crisscross indentations.


Bake the dough for 10-12 minutes. When done, the cookies will be lightly colored and still be a little soft. Let the cookies cool on the baking sheet for a minute before transferring them to a cooling rack. Cool to room temperature.

Monday, February 14, 2011

Restaurant Review: High Tea at Rutherford House

I wish I could say that I haven’t posted in a week because I wanted to lead up to this amazing post that I’m about to do…but the truth is, I’ve just been too busy to bake. My dessert intake last week mainly consisted of pretzels dipped in Nutella. And there isn’t much of a blog entry in that.

However, I’ve finally put together my very first restaurant review! And it’s one that is 100% appropriate for this blog. It’s cute and sweet and girly! I can’t believe I didn’t do it sooner.

My girlfriends and I have been dying to go for tea at the Rutherford House on the U of A campus for months now. We finally got ourselves organized though and made a reservation for yesterday as kind of a Valentine’s Day girls date. Not that we’re all single and bitter or anything…it’s just that we’ve accepted the fact that the men in our lives would never take us on such a cute date so we might as well just take each other instead. Makes perfect sense, right?

So we all wore girly dresses and spent the afternoon in the lovely Arbour Restaurant at Rutherford House. The “dining room” area where we were seated was much smaller than I expected (the picture on the website makes it look bigger) so I understood why reservations were needed. It’s was an intimate and beautiful space though, with one wall completely made of windows allowing for lots of natural light.

There were 6 of us, so we ended up pairing up and splitting 3 of the different “Afternoon Tea” options they had.

Krystyn and Sandi had The Arbour High Tea ($42 for two) which consisted of a choice of either cucumber or egg salad finger sandwiches followed by a turkey pot pie, a course of sweet scones and an assortment of cookies, dainties and fresh fruit for dessert. Lindz and I shared Mrs. Rutherford’s Tea ($34 for two) which consisted of herbed cream cheese pinwheels and a choice of either cucumber or egg salad finger sandwiches, sweet scones as well as an assortment of cookies, dainties and fresh fruit. Lastly, Steph and Karen shared Hazel’s Tea ($24 for two) which was sweet scones, cookies, dainties and fresh fruit.

Each pair also had a pot of the Rutherford House blend tea (included with the food) which was an earl grey tea with notes of jasmine.


Needless to say, everything was ridiculously delicious. The tea was sublime (I had about 8 cups…) and all the food was amazing. The herbed pinwheels and cucumber sandwiches were so cute and dainty, which was a good thing as there was so much food to try, it would be easy to get full too fast.


The turkey pot pies were probably the cutest things I had ever seen – and they smelled amazing! They also had huge sprigs of rosemary in them...and I’m a huge fan of rosemary.


The cookies and dainties were pretty standard, though the pink-topped squares were probably my favorite. They seemed to be a layer of gram crackers, a layer of walnuts and then a layer of pink icing to finish.


Finally, there were the scones…big, warm, delicious scones with a generous serving of raspberry butter and Devonshire cream. I couldn’t get enough. I actually think I love Devonshire cream more than I love most people in this world.


So all in all, it was a lovely afternoon – one I would definitely repeat. In fact, I may just go back there for more scones and tea…


The ladies (Sandi, Krystyn, Lindsey, myself, Steph & Karen).

Saturday, February 5, 2011

Dark Chocolate Nutella Cupcakes with Nutella Buttercream

Today is World Nutella Day. The one day of the year completely devoted to that addictive little chocolate-hazelnut dessert spread known as Nutella. I only first tried this dangerous treat about 4 years ago, believe it or not. I had actually been nervous to try it as everyone I knew in my life who had tried it warned me that I wouldn’t be able to stop if I did. It might just take over my life.

They were right.

I love Nutella. A lot. I will commonly spread it on just about every fruit I can find. Or on toast. Or just out of the container with a spoon. Apparently, I’m not alone on this either.

Today, all Nutella lovers unite to share their mutual love of this dangerous and delicious spread. And in its honor, I have made Nutella cupcakes.

That’s right. Nutella cupcakes.

You’re welcome.

Dark Chocolate Nutella Cupcakes
(Adapted from Cake on the Brain’s Dark Chocolate Cupcakes)
Because I mixed the Nutella right into the batter, these cupcakes are very fragile (as it doesn’t really bake too well). Just make sure you don’t fill the cupcake liners too full! Next time, I might just swirl some in…but either way, these are ridiculously moist and delicious cupcakes. They just have a weird order of being mixed together…but it was totally worth it.

Ingredients:

1/2 cup unsalted butter
2 ounces dark chocolate, chopped
1/2 cup cocoa
1/2 cup Nutella
3/4 cup flour
1/2 teaspoon baking soda
3/4 teaspoon baking powder
2 large eggs
3/4 cup sugar
1 teaspoon vanilla extract
1/2 teaspoon salt
1/2 cup plain yogurt

Directions:

Preheat oven to 350 degrees. Line standard-sized muffin pan with baking-cup liners.

Combine butter, chocolate and cocoa in medium heatproof bowl. Set bowl over saucepan containing barely simmering water; heat mixture until butter and chocolate are melted and whisk until smooth and fully combined (I just did this in the microwave and watched it really closely…and it worked the same). Stir in Nutella and then set aside to cool until just warm to touch.

Whisk flour, baking soda and baking powder in small bowl to combine. Whisk eggs in second medium bowl to combine; add sugar, vanilla and salt and whisk until fully incorporated. Add cooled chocolate-Nutella mixture and whisk until combined. Sift about one-third of flour mixture over chocolate mixture and whisk until combined; whisk in yogurt until combined; then sift in remaining flour mixture and whisk batter until it is homogenous and thick.

Divide batter evenly among muffin pan cups (no more than 3/4 full!!). Bake until skewer inserted into center of cupcakes comes out clean, 18-20 minutes.

Cool cupcakes in muffin pan on wire rack until cool enough to handle, about 15 minutes. Carefully lift each cupcake from muffin pan and set on wire rack. Cool to room temperature before icing, about 30 minutes.

World Nutella Day Icing
(Stolen from The Unrepentant Carbivore)
This icing is sweet…really sweet. But still amazing. However, I’m pretty sure it sent my blood sugar through the roof.

Ingredients:

1 cup confectioners' sugar
1 cup Nutella
1/3 cup unsalted butter, room temperature
1 teaspoon pure vanilla extract
1/4 teaspoon salt
1/3 cup whipped cream

Directions:

Place the confectioners' sugar, Nutella, butter, vanilla, and salt in the bowl of an electric mixer fitted with a paddle attachment. Mix on medium-low speed until creamy, scraping down the bowl with a rubber spatula as you work. Add the cream and beat on high speed until the mixture is light and smooth.


Linked on Sweets for a Saturday.

Friday, February 4, 2011

Friday Night Cookies

Some people go out on Friday nights. Out with friends, out to dinner, out to the bar, out on a date…me, when I have a free Friday night, I usually bake. I might have a glass of wine…or two. I might also make a spontaneous trip to Homesense and buy ridiculously adorable teacups that I really don’t need. I might also put on yoga pants and a Team Jacob t-shirt and search online for the best oatmeal cookie recipe known to man…

I did all of these things tonight. And it was glorious.

Sometimes, I get a hankering for oatmeal cookies. Plain and simple. So tonight, I made some. I omitted the raisins though. I just wasn’t feelin’ them.

However, the cookies did turn out pretty awesome. I may have eaten about 6 or 7 right out of the oven…

Yeah. They’re that good.

So if you’re a nerd like me and not out being social and sexy on a Friday night, you should make these cookies. Just sayin’.

Oatmeal Cookies
(Adapted from The "BEST" Oatmeal Cookie recipe)

Ingredients:

3 eggs, beaten
1 teaspoon vanilla extract
1 cup butter, softened
1 cup brown sugar
1 cup white sugar
2½ cups all-purpose flour
1 teaspoon salt
1 teaspoon ground cinnamon
2 teaspoons baking soda
2 cups rolled oats
3/4 cup chopped pecans

Directions:

Preheat oven to 350 degrees

In a small bowl, combine the eggs and vanilla. In a medium bowl, cream together the butter, brown sugar, and white sugar. In a separate bowl, combine the flour, salt, cinnamon and baking soda.

Add the flour mixture to the creamed mixture and stir until all of the dry ingredients are absorbed. Next, stir in the egg and vanilla mixture, then stir in the rolled oats and pecans. Dough will be stiff – you can add a little bit of milk at this point if you like to moisten it a bit. Drop dough by teaspoonfuls onto an unprepared cookie sheet.


Bake for 10 to 12 minutes, until the edges are golden. Allow cookies to cool 5 minutes on the baking sheet before removing to a wire rack to cool completely.

Tuesday, February 1, 2011

Carrots, spice and everything nice!

One of my absolute favorite cakes in the entire world is carrot cake. It actually surprises me how much I love it now considering how much I despised it as a child. But I guess most children aren’t too keen on vegetables in their cake…at least, I wasn’t.

Then I grew up. My tastes matured. I learned to love mushrooms and olives and even became quite tolerant of onions and eggplant – all foods I hated when I was little. I also fell in love with carrot cake. But I think I was spoiled because my first carrot cake experience was so good that I’ve become a bit of a carrot cake snob. I’m very picky when it comes to carrot cake now – it has to be moist, but not too dense, with just enough spice and sweetness. Not to mention copious amounts of cream cheese icing.

Oh, and no raisins. I like raisins in some things, but NOT carrot cake. I get furious when people put raisins in carrot cake.

Yeah…I’m weird like that.

But anyways, I’ve strived to find a great carrot cake recipe…and I think I’ve finally found it. At least, for now. It’s from a cookbook of comfort food by real mothers and I have to say, it’s pretty darn amazing. The secret is purée-ing the carrots, as opposed to shredding them. It gives the cake a ton of moisture and just enough of that signature taste. I also upped the spices a bit and took out the walnuts – only because I didn’t have any. Otherwise, they would’ve been in there. Walnuts are a must in carrot cake for me…except when I have none and I’m desperately craving it but it is -30 out and I refuse to leave my house. In other words, only in extreme circumstances do the walnuts get left out.

But enough yacking about carrot cake, how about you go make some? Here, I’ll even give you the recipe.

Carrot Cake w/ Cream Cheese Frosting
(Adapted from my “Mother’s Best Comfort Food” cookbook)

Ingredients:

1 pound carrots, peeled and thinly sliced (about 4 medium carrots)
2 cups all-purpose flour
2 teaspoons baking soda
2 teaspoons ground cinnamon
1/2 teaspoon ground nutmeg
1/4 teaspoon allspice
1 teaspoon sea salt
1 cup vegetable oil
1 cup brown sugar
1 cup white sugar
3 large eggs
2 teaspoons pure vanilla extract
1 cup packed sweetened shredded coconut
3 cups walnuts (divided)

Directions:

Fill a saucepan with a couple inches of water. Set over high heat and bring to a boil. Place the sliced carrots in a steamer basket and set over the saucepan. Cover and steam the carrots until very tender when pierced with a fork, about 20 minutes. (You can also bring a pot of water to a boil, add the carrots, cover, and cook until tender – that’s what I did.) Place the carrots in the bowl of a food processor fitted with a metal blade and purée until smooth (I used my magic bullet). You should have 1 1⁄3 cups puréed carrots.

Preheat the oven to 350°F. Grease the bottom and sides of a 13x9x2-inch baking dish or two 9-inch cake pans with oil. Sprinkle in a little flour and turn the pan(s) to evenly coat the greased areas.

Sift the flour, baking soda, cinnamon, nutmeg, allspice and salt into a medium bowl.

In a large bowl, mix the oil and sugar until combined. Add the eggs one at a time and beat until well incorporated before adding the next. Add the vanilla and carrots and beat for another minute. Slowly add in the sifted dry ingredients, mixing just until combined. Stir in the coconut and 1 cup of the walnuts.

Pour the batter into the prepared pan(s) and bake in the center of the oven for 35 to 40 minutes, or until a toothpick inserted in the center comes out clean and the cake is pulling away from the sides of the pan(s). Remove the pan(s) from the oven and place on a wire rack to cool. After 15 minutes, place a cooling rack(s) over the pan(s) and invert (so the cake falls out of the pan and onto the rack). Cool the cake for at least 1 hour before frosting.


Cream Cheese Frosting

Ingredients:

2 8-oz packages cream cheese, softened
1/2 cup unsalted butter, softened
2 cups icing sugar
1 teaspoon vanilla

Directions:

Beat cream cheese, butter, and vanilla with a mixer on medium speed until combined. Slowly add icing sugar, and beat until it’s at the consistency you want.


Now, all you have to do is frost your cake and eat up! Warning...this makes alot of cake...and you may be tempted to eat it all. I was. My thighs are hating me right now.